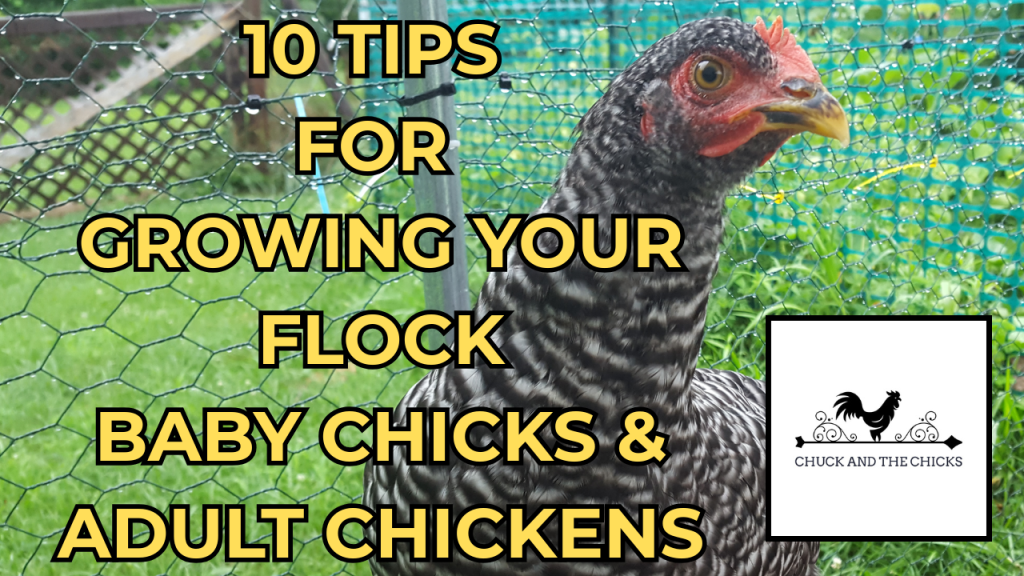
10 Tips For Growing Your Flock New Baby Chicks & Adult Chickens
Growing your flock is a natural next step for many beginner chicken keepers. After your very first flock of chickens, you now have a basic brooder set up, dedicated chicken equipment, a finished coop, and very likely a chicken run or a fenced outdoor enclosure. You’ve already learned about chicken nutrition and requirements at different stages of life. You’re ready to keep growing your flock! Here are some things to consider:
How are you going to grow your flock?
When it comes to growing your flock, you have a few options. You may choose to hatch chicks naturally from your current flock. Hatching naturally at home is its own dedicated subject and I have a whole video about that topic on my YouTube channel. Hatching naturally at home has many advantages including the pivotal role that a mother hen plays when acclimating her new chicks into the existing flock.
You may choose to purchase new chicks or to add additional breeds to your existing flock. There are advantages and challenges to raising a mixed flock. Keep in mind when introducing new breeds of chicken to one another the acclimation process will likely take longer. It is also important to select breeds that are compatible with both their temperament and their purpose. New baby chicks will require their own dedicated brooder environment until they are at minimum 8-10 weeks old and fully feathered before beginning the introduction process outside. Without a full set of feather baby chicks are vulnerable to both temperature and lethal injuries from pecking order skirmishes.
You may decide adopting or rescuing unwanted adult hens is right for you. Rescue hens are often available at very little cost or free and are much easier to care for than young baby chicks. After a short acclimation process, they will be ready to lay eggs much sooner than new baby chickens. Adult chickens will require an isolation period of at least 2 weeks but preferably 4 weeks to ensure they are free from pests and disease before introducing them to your existing flock. Physical isolation is needed for biosecurity not just visual isolation. Things like a fence or tarp will not prevent the spread of pests and disease. Your rescues will need their own dedicated temporary facilities complete with their shelter, perches, food, water, grit, and calcium supplement until they are ready to join your existing flock.
Make sure your new chickens are compatible with both temperament and breed.
Combining chickens with more docile, tame temperaments with naturally more flighty or aggressive breeds can result in excessive injuries, bullying, or even the death of one or more of your chickens. The purpose of your chicken breed (egg layers, companionship, show birds, or meat birds) will determine the kind of housing and nutrition they need. Meat birds like the Cornish Cross have entirely housing and nutritional needs than heritage breed egg layers. Egg laying flocks and dedicated meat flocks will require separate housing and nutrition specific to their breed and purpose. If you’re planning to process meat chickens at home for the first time, be sure to thoroughly research humane methods and obtain the proper equipment. Incorrectly processing chickens at home not only can result in spoiled, unusable meat but will result in needless suffering for both you and the animal. The American Pastured Poultry Producers Association, I’m not affiliated with them, they offer many resources about this topic online. Additional resources about chickens are available in the book section of your local farm box store, your local bookseller, online book sellers, and your local library.
Make sure you have enough room for additional flock members.
Overcrowding is one the primary causes of pest and disease outbreaks and unwanted aggressive behavior in chickens. Overcrowding can lead to things like unsanitary conditions, diseases and pests, feather pecking, aggression, and in some extreme cases even cannibalism. The recommended bare minimum space recommendations for standard size chickens are 4 square feet of coop space per chicken and 8-10 feet of run space per standard size chickens. Bantams require approximately half of that. Larger, heavier breeds need more space. If you aren’t free-ranging your flock and they will be living in full-time confinement their coop and run enclosure are their whole world. Especially in those situations providing adequate enrichment, timely cleaning and maintenance, and providing as much space as possible for crucial for the long-term health and happiness of your flock.
Chicks need to have a full set of feathers before introductions begin.
Baby chicks will be fully feathered and ready to leave their protected brooder environment to begin the transition outdoors sometime between 8-10 weeks of age. Before meeting the rest of the flock, without a mother hen to keep them warm or defend them, your baby chicks will need a full set of feathers. Feathers make it possible to regulate their own body temperature and will protect them from minor pecking which is a natural part of the acclimation process. Chicks covered in fuzz without feathers may die from temperature drops or wounds as a result of minor pecking. Baby chicks introduced when they are too young and too small will not be perceived by the existing flock as young chickens but as potential food sources or competition for resources. *Hens do not automatically want to mother and protect unfamiliar chicks. A hen’s mothering instincts are activated when she is broody and her hormones have facilitated natural motherly and parenting behaviors. Without active broody hormones, a hen will view an unfamiliar chick as a peer, and therefore competition within the pecking order, or as a food source. Remember, your chickens are omnivores meaning they need both protein and energy sources like vegetable matter and grains to be healthy. Chickens will readily eat animals smaller than them including mice, frogs, lizards, and yes even unfamiliar baby chicks if they are not introduced properly.
Begin introductions visually before even introducing chickens to the same space.
If you’ve ever introduced new cats to one another, the process to introduce new chickens to your flock is amazingly similar. Your flock should be able to meet new members visually first through a protected enclosure where your flock can see the new chickens but not interact with them directly. Allow your flock to see the new chickens for at least 1-2 weeks prior to beginning introductions. You can construct an enclosure with hardware cloth to offer your new chickens maximum protection during this process. You can also adapt things like a large dog crate for this purpose. Your new chickens will need their own food, water, grit, and calcium in their area until they can be incorporated into your existing flock.
Start with short, monitored periods of inclusion and work up to longer periods. Patience is key.
I begin by opening the enclosure door and monitoring interactions with the flock for about an hour at a time, building up to larger windows of time. I watch the first interactions carefully. I maintain the separate introduction enclosure for as long as the process takes. The type of breeds you have your in flock, your experience level, your facilities, the health and age of your flock, the nutrition you provide, the time of year, and weather conditions will all have an impact on the acclimation process. I don’t consider a new group of chickens fully acclimated to the flock until they are all roosting together at night. This process can take as little as a week but normally up to a month until all the new members of the flock have found their way into the existing pecking order. Patience is key. Use the introduction enclosure for as long as it is needed. Rushing the process can result in permanent injury or in extreme cases even in the death of one or more of the new chickens.
Pecking is part of the process. Know when to step in.
The pecking order is quite literal and knowing when to intervene is crucial. Minor warning pecks are a normal part of chickens beginning to incorporate new members into the flock. A short warning peck serve to let the new chicken know they are below that flock member in the pecking order. Your new chickens will be starting at the bottom. I intervene if the pecking lasts longer than 30 seconds, if injury is a possible result, or if blood is drawn. You may have one specific flock member who is especially aggressive and resistant to new flock members. It may be necessary to isolate this particular flock member in their own isolation plan and reintroduce them after a few days to allow the new members to integrate successfully. Removing a chicken from the flock for any length of time diminishes their standing in the pecking order making them less likely to resume bullying new members.
Space makes the process easier. Provide hiding places and plenty of perches. Enrichment makes a big difference!
Give the introduction process plenty of space. Make introductions on a day when good weather will allow you to introduce the new chickens in a large area so they can escape bullying. Provide objects such as plenty of perches, old wooden stumps, and bales of straw to allow the new flock members to perch and hide from bullying. Be sure to remove any sharp edges or protrusions from perching objects to avoid bumble foot (an infected laceration on your chicken’s foot). Distract your established flock with treats during the introduction process. Scattering meal worms, scratch grain, or hanging half a cabbage during the introduction process can distract and calm existing flock members and help the transition of adding new members go more smoothly.
Consistency and patience are your best tools.
If introductions go very poorly, resume using your introduction enclosure and start the process again with small windows of time with the flock together. All flocks vary in their readiness to accept new members but after a few weeks you should begin to see the flock becoming whole. Signs your new chickens have been accepted include eating and drinking together, grooming one another, and roosting together at night.
Other important tips.
Don’t introduce just one chicken to your flock. Chickens should be introduced at minimum as pairs but preferably groups of at least 3 of the same breed (same type of chicken) which allows your chickens to have natural companions within the pecking order. Introducing just one chicken will make that chicken subject to extreme bullying. That is doubly so if the solo chicken is a different breed than your existing flock.
Don’t force introductions in small spaces. Introduce your chickens with as much available space as you can. Forcing introductions in a small, crowded coop with no means of escape will likely result in your new chickens being injured or worse.
Reduce your flock’s overall stress during the introduction process. Introducing new chickens is stressful for them and your existing flock. Things like unsanitary conditions, overcrowding, or poor or inadequate poultry nutrition can aggravate an already tense time. Make sure your flock has plenty of resources and clean facilities when beginning your introductions.
Multiple food and water stations are needed as your flock grows. Providing multiple food and water stations allows elderly, young, and less dominant flock members to eat and drink without harassment.
When to introduce a mother hen and her chicks?
A mother hen and chicks will need their own protected enclosure while the baby chicks are first being hatched and raised for the first few weeks of their life. Their protected enclosure can double as their introduction enclosure. When chicks are approximately 1-2 months old you can open the door to the enclosure and as you would with other chickens, monitor short periods of introduction building up to larger blocks of inclusion time before finally removing the enclosure. Your mother hen will set the pace for how often and how close she will allow flock members to interact with her chicks until somewhere around 8-10 weeks of age she will begin to distance herself from her chicks (when they grow into either pullets or cockerels) and resume her place in the pecking order leaving her new chicks to find their own way into the flock. The pullets and cockerels (teenage hens and roosters) will operate as their own small flock and gradually acclimate with time. If needed, you can enact an inclusion enclosure, but when a mother hen is present the process is typically much smoother overall. Every flock is different so monitor the situation with daily observation.
When are growing chicks (pullets and cockerels) ready to switch to adult formula chicken feed?
The earliest your young hens will be ready to lay eggs is approximately 4 months old. Keep in mind depending on their breed your hens will go on lay anytime between 4 months old to 1 year old. Factors like their breed, nutrition, environmental factors, health, stress, and lineage will all impact their individual timing. Hybrid and heritage breeds will go on lay much sooner than ornamental breeds as egg laying was not a priority in the development of ornamental breeds. I begin to transition to adult formula complete poultry feed approximately at 3 months of age having completely transitioned to adult formula by 4 months. I transition the feed the way you would gradually change any other style of animal feed. I offer a mixture of half grower starter formula combined with half regular adult feed and gradually transition to adult feed at 4 months. Grower starter has high amounts of protein but not the amounts of calcium an adult layer chicken requires. Layer chicken feed maintenance style has less protein than grower starter formula and more calcium which is difficult for the younger chickens’ body to process. If your adult hens eat the grower starter it won’t harm them, but it doesn’t have the correct nutrition formula, especially calcium, for adult laying hens. Make sure your flock has access to calcium and grit supplement in a free choice dish or dispenser especially if they are living in partial or full-time confinement. Calcium supplement helps to prevent soft shells and aids in feather regrowth. Grit is essential to helping chickens digest their food properly and it also helps to prevent conditions like impacted crop or sour crop. Chickens of all ages need access to fresh, clean water.
Is the process different for adult chickens?
Introduce new adult chickens after two weeks but preferably 4 weeks of physical isolation from your existing flock. This ensures you are not introducing pests or disease into your existing flock. The process varies only in the size of their inclusion enclosure otherwise all of the steps are the same. Begin with visual introductions in their safe isolation enclosure before combining them with your established flock. Monitor introductions beginning with small windows of acclimation and building up to larger ones. Plenty of space, enrichment, patience, treats, clean facilities, and good timing will all help the acclimation process go more smoothly.
I hope you enjoyed this post all about introducing new chickens to your existing flock and growing your backyard flock. If you want to learn more about backyard chickens and homesteading be sure to check out Chuck’s other social media linked below.
